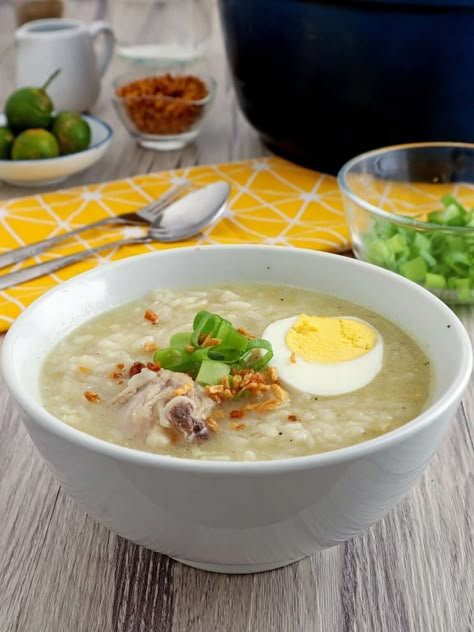
Quick Overview: Difficulty & Cooking Time
Difficulty: Easy to Moderate
Preparation Time: Approximately 15–20 minutes
Cooking Time: Approximately 40–50 minutes
Servings: 3–4 servings
Ingredients and Realistic Substitutions
You may be able to find substitutes at large local supermarkets or Asian grocery stores.
- Chicken: 1 to 1.2 lbs (approx. 500g) of bone-in chicken thighs, chicken breasts, or leftover rotisserie chicken. (Bone-in cuts yield a richer broth; if using rotisserie chicken, use ready-made chicken stock.)
- Rice: 1 cup short-grain white rice (sushi rice), soaked in cold water for 20–30 minutes. Substitutes: Medium-grain rice, Calrose rice, Jasmine rice, or even cooked white rice (which shortens cook time).
- Aromatics for Broth:
- 5–6 cloves whole garlic
- 1 thumb-sized knob of ginger, sliced
- 2 green onions (scallions), halved
- 1/2 medium yellow onion
- 6–7 cups cold water
- Vegetables:
- 1/3 cup finely diced carrots
- 1/3 cup finely diced zucchini or mushrooms (shiitake or cremini)
- Seasoning & Garnish:
- 1 tablespoon toasted sesame oil
- 1–2 teaspoons light soy sauce, Korean soup soy sauce (guk-ganjang), or fish sauce (optional, for depth)
- Fine sea salt and ground black pepper to taste
- Toasted sesame seeds and sliced green onions for garnish
Step-by-Step Cooking Order
- Prepare the Rice: Rinse the short-grain rice several times until the water runs mostly clear. Soak it in a bowl of cold water for 20–30 minutes, then drain well.
- Make the Chicken Broth: In a large pot, combine the raw chicken, whole garlic cloves, sliced ginger, halved green onions, onion half, and 6–7 cups of water. Bring to a boil over medium-high heat, skim off any foam, then lower the heat to medium-low. Cover and simmer for 25–30 minutes until the chicken is tender and cooked through.
- Shred Chicken and Strain: Remove the chicken pieces and let them cool slightly. Strain the broth into a bowl and discard the spent garlic, ginger, and onion. Shred the chicken meat into bite-sized strips and set aside.
- Sauté the Rice: In the empty pot, heat 1 tablespoon of toasted sesame oil over medium-low heat. Add the drained rice and sauté gently for 1–2 minutes until the grains become slightly translucent.
- Simmer the Porridge: Pour in 5 to 6 cups of the reserved warm chicken broth. Bring to a gentle boil, then lower the heat to low. Cover partially and let it simmer for 15–20 minutes, stirring occasionally to prevent the rice from catching on the bottom.
- Add Chicken and Veggies: Stir in the shredded chicken, diced carrots, and diced zucchini/mushrooms. Continue simmering on low heat for another 8–10 minutes, stirring frequently, until the vegetables are tender and the rice grains have softened into a creamy porridge texture. Add extra broth if it gets too thick.
- Season and Serve: Stir in 1 teaspoon of soy sauce and a pinch of salt. Ladle into warm bowls and garnish with chopped green onions, toasted sesame seeds, a light drizzle of sesame oil, and freshly ground black pepper. Serve with extra salt on the side.
Common Mistakes and How to Avoid Them
- Scorching the Bottom: Rice starches sink quickly. Once the mixture thickens, reduce the heat to low and stir the bottom of the pot every few minutes with a wooden spoon or silicone spatula.
- Over-Salting Early: As the porridge simmers, the liquid evaporates and concentrates flavors. Keep the initial seasoning light and allow each person to adjust the saltiness in their own bowl.
- Soggy Vegetables: If diced vegetables are added at the very beginning with the rice, they can disintegrate. Add them in the final 8–10 minutes of cooking so they retain texture and color.
Storage Tips for Leftovers and Unused Ingredients
- Cooked Dakjuk: Store leftovers in an airtight container in the refrigerator for up to 3–4 days. The rice will continue to absorb liquid and solidify; when reheating on the stove or in the microwave, stir in a few tablespoons of water or broth to restore the silky texture.
- Freezing: Dakjuk freezes well for up to 1 month. Thaw overnight in the fridge and reheat gently with additional liquid.
- Unused Aromatics: Freeze remaining whole ginger slices in a small freezer bag for future broths. Wrap leftover green onions in a dry paper towel inside an airtight container to keep them crisp.
Spice Adjustment or Vegetarian Option
- Adding Heat: Dakjuk is traditionally mild and comforting, but you can add heat by topping it with thinly sliced fresh jalapeño or serrano peppers, a light drizzle of chili oil, or serving it alongside spicy aged kimchi.
- Vegetarian/Vegan Variation: Replace the chicken and chicken broth with a rich vegetable or dried shiitake mushroom broth. In place of chicken, use a combination of firm tofu cubes, diced king oyster mushrooms, and soaked dried shiitake mushrooms sautéed in sesame oil.
한국어 레시피 (해외 식재료 버전)
해외에서도 일반 대형 마트나 아시안 마트에서 쉽게 구할 수 있는 재료로 따뜻하고 든든한 닭죽을 만드는 실전 가이드입니다.
1. 요리 개요
- 난이도: 쉬움 ~ 보통
- 준비 시간: 약 15~20분
- 조리 시간: 약 40~50분
- 분량: 3~4인분
2. 재료 및 현지 대체 가이드
대체 식재료는 거주 지역의 대형 슈퍼마켓(Supermarket) 또는 아시안 마트에서 구하실 수 있습니다.
- 닭고기: 뼈 있는 닭다리살(Chicken Thighs) 또는 닭가슴살 450~500g (로티세리 치킨 살을 찢어 쓰고 시판 치킨 스톡을 활용해도 좋습니다.)
- 쌀: 스시라이스(단립종) 1컵 (자스민 라이스나 칼로스 쌀, 혹은 찬밥 1.5~2공기로 대체 가능)
- 육수용 향신채: 통마늘 5~6알, 생강 1톨(편 썰기), 대파 또는 Scallion 2대, 양파 1/2개, 물 6~7컵
- 채소: 당근 1/3개, 주키니 호박 또는 버섯(양송이/표고) 1/3컵 (잘게 다짐)
- 양념 및 고명: 참기름 1큰술, 국간장 또는 진간장 1작은술, 소금, 후추, 통깨, 송송 썬 쪽파
3. 단계별 조리 순서
- 쌀 불리기: 쌀은 깨끗이 씻어 찬물에 20~30분간 불린 후 체에 밭쳐 물기를 뺍니다. (찬밥을 사용할 경우 이 과정은 생략합니다.)
- 닭 육수 끓이기: 냄비에 닭고기, 통마늘, 편 썬 생강, 대파, 양파, 물 6~7컵을 넣고 끓입니다. 끓어오르면 불순물 거품을 걷어내고, 뚜껑을 덮어 중약불에서 25~30분간 푹 익힙니다.
- 고기 찢기 및 육수 거르기: 익은 닭고기는 건져내어 한 김 식힌 뒤 먹기 좋게 결대로 찢어줍니다. 육수는 향신채를 건져내고 맑은 국물만 따로 둡니다.
- 쌀 볶기: 냄비를 가볍게 헹군 뒤 참기름 1큰술을 두르고 불린 쌀을 넣어 중약불에서 1~2분간 투명해질 때까지 달달 볶습니다.
- 죽 끓이기: 걸러둔 닭 육수 5~6컵을 냄비에 붓고 저어가며 끓입니다. 끓기 시작하면 불을 약불로 줄이고 뚜껑을 살짝 열어둔 채 15~20분간 뭉근하게 끓입니다. (바닥에 쌀이 눌어붙지 않도록 중간중간 저어주세요.)
- 채소 및 고기 넣기: 쌀알이 부드럽게 퍼지면 찢어둔 닭고기와 다진 당근, 주키니(또는 버섯)를 넣고 약 8~10분간 더 끓입니다. 농도가 너무 되직하면 남은 육수나 물을 조금 보충합니다.
- 간 맞추기 및 완성: 국간장 1작은술과 소금 한 꼬집으로 기본 밑간을 합니다. 그릇에 담고 송송 썬 파, 통깨, 참기름 한 방울, 후춧가루를 톡톡 뿌려 완성합니다. 모자란 간은 소금을 곁들여 각자 맞춥니다.
4. 조리 시 주의할 점 & 실패 방지 팁
- 바닥 눋지 않게 젓기: 전분기 때문에 불을 조금만 세게 해도 바닥이 타기 쉽습니다. 약불을 유지하고 나무 주걱으로 냄비 바닥을 자주 긁어주며 저어주세요.
- 간은 약하게: 죽을 끓이는 동안 수분이 날아가며 간이 세질 수 있습니다. 처음부터 짜게 맞추지 말고 담백하게 끓인 뒤 먹기 직전에 소금/후추로 조절하는 것이 안전합니다.
5. 보관법 및 변형 팁
- 남은 죽 보관: 밀폐용기에 담아 냉장 보관하면 3~4일간 보관 가능합니다. 냉장고에 들어가면 쌀이 수분을 흡수해 단단해지므로, 다시 데울 때 물이나 육수를 서너 큰술 넣고 저어가며 데우세요.
- 채식 변형: 닭고기 대신 표고버섯, 새송이버섯과 단단한 두부(Firm Tofu)를 깍둑썰기해 넣고 채소 육수로 끓이면 훌륭한 채식 버섯죽이 완성됩니다.